Saturday, September 3, 2011

Bernard Stoewer Treadle Sewing Machine - threading the shuttle bobbin

taylamist said...
Hi Tammy, Can you help me, my hand crank turns smoothly, but doesn't pick up the bobbin thread to complete the stitch. I have replaced the needle but I'm concerned about the shuttle the spring piece is a little bent out as if someone has grabbed it to pull the shuttle out. Do you know of any that will fit. Sorry to trouble you but info is very scarce on these. PS I'm in Australia.
My experience with all sewing machines is that if either the upper needle or the bobbin is not threaded correctly, the machine will not sew period. This is what the shuttle bobbin looks like threaded in my treadle.
My finger is pointing at the lever to raise the shuttle to remove it from the machine.
The lever raises the shuttle from the top end of the bobbin casing.
I hope you can see from these photos that the wire spring device is bent.  There is quite a gap between the bobbin case and the metal spring.
 
The gap is at least as wide as a sewing machine needle is thick.
First fill the bobbin. Load the bobbin into the shuttle with the hole side of the rod bobbin first.  If there is no hole in your rod bobbin load the rod so that the thread comes off the bobbin counter clockwise.
 
Draw the thread from top down the slot in the bobbin shuttle.
Follow the thread path up, through and under the spring.
Put the bobbin shuttle into the shuttle track.
With the needle threaded, hold the end of the needle thread and turn the wheel towards you, the needle thread will pull up the bobbin thread.
Next, slide something (seam ripper) between the presser foot and the throad plate to separate the upper and lower threads and completely pull up the lower bobbin thread end.
 Check to ensure the upper needle thread is threaded correctly.
On this machine the needle must be threaded from left to right.  When replacing the needle the flat part of the needle faces the right.  Always test your stitches before sewing anything.
Top side. 
 Bottom
 
 Loaded bobbin.
Treadle in action.  For this blog post I was multitasking by running the sewing machine and camera at the same time.
I do not have a manual.  However, my Bernard Stoewer treadle is almost identical to the Singer 127, with the exceptions being the little hole on one side of the rod bobbin as well as Stoewer has a stitch length lever with a reverse, whereas the Singer has a screw to regulate stitch length and no reverse.  The Singer 127/128 manual is available as a pdf for free from ISMACS (International Sewing Machine Collectors' Society).  Page 8 and 9 of this manual provide excellent written instructions with illustrations on how to thread the bobbin shuttle.  Hope this helps!  Enjoy and have fun sewing.

Thursday, August 11, 2011

Green Elna Supermatic Sewing Machine

Manufactured in Switzerland in June 1954.  This Elna is operated with a knee bar rather than a foot pedal.  The all metal case converts the free arm to a flat bed sewing surface.  I like the way Elna designed the case to be used this way.
My Elna arrived with manual, accessories and half a dozen cams to make decorative and zig zag stitches.
This is where the cams are inserted.
The accessory tray fits over the free arm and opens up where the cams and feet are stored.
Of course, after cleaning, I oiled her up to immediately play with the cams.  I put dark brown thread in the bobbin with yellow in the  top.  Then I switched the top thread to red, I thought it looked better.  Elna sews flawlessly. 
 Look at that paint job!  Isn't she pretty?
The little tool that looks like the letter "Y" is the cam lifter for removing the cams from the machine, it works really well.
This is the accessory box put together.  There is a compartment under the row of bobbins which is holding two screwdrivers.
The sample stitches were made on two pieces of 100% cotton with one layer of 100% cotton batting sandwiched between.  The top layer is plain white and bottom side is white with mint green stripes all salvaged from my scrap box.
I was very impressed with the tension on this Elna, the only trouble I had was when I didn't have the bobbin threaded correctly. The bobbin is located behind the presser foot, which I find difficult to thread properly.
Have a super duper Thursday all.  For more vintage treasures head over to Colorado Lady's blog.

Wednesday, August 10, 2011

Baby's day care bag

I've been sewing reuseable nylon shopping bags, lunch bags and little book/knitting/fruit/toy bags for over twenty years.  I first started making them when grocery stores switched from paper to plastic bags.  I found that the plastic bags fell apart in transit between the grocery store, parking lot, my car and kitchen. My dear friend Evelyn asked me to sew a nylon bag for her grand-daughter to haul back and forth to daycare.  Evelyn gave me a bag which is exact size she wants.  I don't have a pattern for that size so I improvised.  The size of the bag is correct, the fit on the bottom is not perfect, but certainly functional.
This is Pearl my 1940 Singer 15-91 straight stitch sewing machine in a 1914 Singer drawing room cabinet.
The pocket is 100% cotton with 100% cotton batting.  I free-motioned quilted it using Pearl. The feed-dogs are dropped by turning a screw under neath the machine.  The folded ribbons are basted on before finishing the edges.
Pearl sews an excellent precise stitch!  I really, really enjoy top stitching with this machine.  I have walking foot for it, which I rarely use because it feeds so well.
I folded the fabric over to show how lovely the underside stitches are.  The only grief I have with sewing on Pearl is operator error.  The machine sews in reverse when the lever is pushed up, sometimes I forget to push the lever back down for forward stitching so I end up starting a seam in reverse!  Oooops!  I did all the straight stitching on Pearl.
The zig zag stitching on the handles and the embroidery were done on Big Bertha my Pfaff QE 4.


It finished!  Yippee ~ dancing around the room with glee!

Tuesday, August 9, 2011

Simple wedding sewing.

Things have finally settled down in my craft emporium following all the excitement from Shannon and AJ's wedding on July 2nd.  The newlyweds stayed with us until July 10.  They were very busy packing their wedding gifts and Shannon's furniture that we had been storing in our basement since September 2009.   In a sentimental moment, I gifted Shannon my favourite sewing machine (Heidi my Husqvarna 500) and the early 1900s solid block cut oak Singer cabinet Heidi resides in.
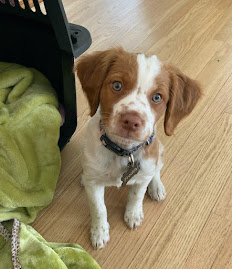
I had more difficulty parting with the cabinet than the sewing machine. They will be living in Kingston, Ontario, where Shannon has plans to sew a dog bed and coat for her new puppy that is expected to be born next week.  I'm delighted that she'll have a reliable sewing machine, as well as a lovely piece of furniture.  I have replaced the Singer cabinet with a small second hand desk, at the moment Ruby my Husqvarna 6570 is set up on it.  The desk has two big drawers full of surger thread and two smaller drawers full of sewing machine accessories, Ruby's cams and manual.  There is tons more storage space in the desk then the old Singer cabinet.
 
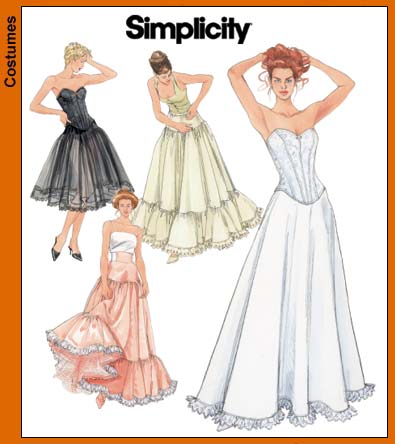
Just before their wedding I did do some sewing but time was at a premium so nothing was blogged about.  I sewed a white cotton corset Simplicity 5006 Misses' Lingerie
I used a narrow red satin ribbon and tiny round eyelet buttonholes.  The pattern called for cording (?) and grommets.  Both were not my idea of lingerie under a wedding gown.  I made view A which is the white corset on the envelope.  It fit her like a glove and reduced her waist from 29 inches to 27.5 inches.  She said it was comfortable, the only problem was she couldn't eat all her wedding dinner because there was no room in the corset for her tummy to expand.  I never took a single photo not even one on the dress form./span> Three of the four bridesmaids had their dresses shortened.  I recycled the fabric to make handkerchiefs for the groom and his groomsmen's tuxedos.  I also made two red garters for Shannon.

  
Véronique's fiancée Scott caught the garter.  They are getting married July 7, 2012 in Montréal.  I will most likely be doing some wedding sewing again next June.